
While still living in a home, why not make it a little nicer on a small budget and do it yourself? One day when you decide to sell, the home will be more prepared to look even better to buyers! Isn’t a more well-prepared, neatly trimmed home nicer to live in while you stay there…and easier to sell when the time comes?
Improve trimming around the walls, doors, and windows
Preparing and paint the trim around the home is one (of many) ideas that can be done well once, and then enjoy the improved look while living in the home! Not convinced? If you have ever been inside a home where the trim around the doors, windows, walls, and floor are clean and neat, you might have noticed it, BUT, when it looks dirty, damaged, sloppy, or poorly painted you most likely noticed it…and how did it make you feel? What impression did it give you?
Take a look at the trim in your own home. Right now. Can it use a do-over? Many people can do it, but it just takes time and a willingness to be patient. Even more so, you don’t have to do it all in one day. It can be done over time on a few different scheduled days! Perhaps one room at a time?
When you done, you’ll be glad you completed the project. And what a visual difference it makes!
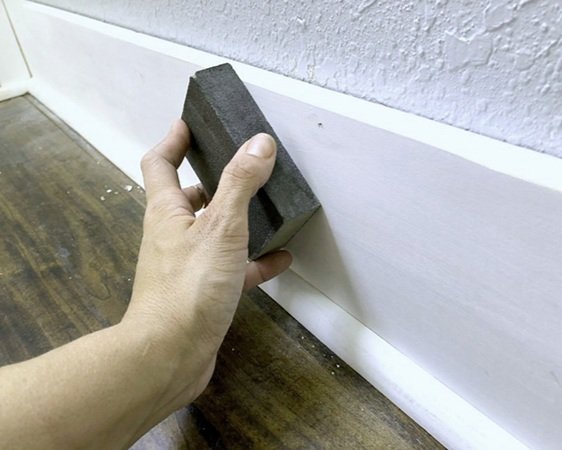
STEP 1: Sand the trim:
Before you just slap on some paint, take the time to make the surfaces at least reasonably sooth, or better.
- A folded sheet of sandpaper and finger pressure work great for most areas.
- A rubber sanding block is comfortable to grip, works well with feathering and lets you apply more even pressure in stubborn areas like windowsills.
- A sanding sponge or pad conforms readily to curves and crevices.
STEP 2: Fix Holes, Dents, and Nails (sticking out).
To repair large dents, minor damage, scraps, etc., on edges that are vulnerable to abuse, use hardening wood filler. Fill any other smaller dents and holes with spackling compound. Spackling compound sometimes shrinks as it dries, you might have to apply a second (and possibly a third) coat after the previous coat fully dries. Take the time to inspect your trimming by shining a flashlight at an angle across the woodwork to help highlight depressions you may not have noticed and to ensure that you don’t miss any spots as you’re applying the filler. Let the filler dry and sand it smooth.
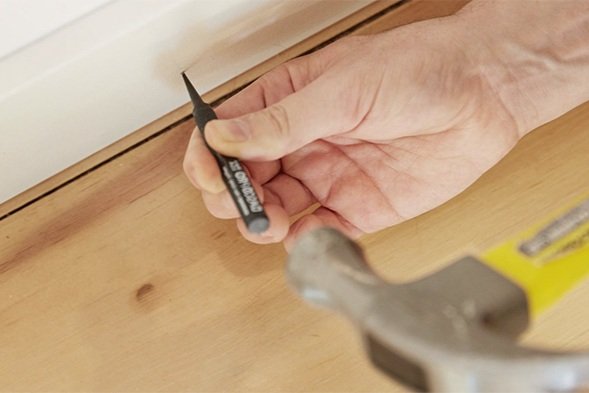
Carefully drive nails down that are sticking out
If nails head are sticking out, either use the existing nail or remove it and use a nail that is a little bit longer to penetrate into the wall since nails coming out may not hold well when trying to put them back down. Consider using a Nail Set and Counter Punch tool to drive a nail into the trim. Then, fill the tiny hole with a touch of spackle to hide it.
STEP 3: Dust, Vacuum, and Wipe Down:
When sanding and scraping is complete, dust off all areas with a brush and vacuum the area and use the brush attachment if you have it. Finish by wiping down the wood with a damp cloth if using water-based paint or a tack cloth if using oil-based paint. If you plan on using gloss or semi gloss paint, then spot-prime spackle-filled and raw wood areas or else the paint may be dull in filled areas (see image below).
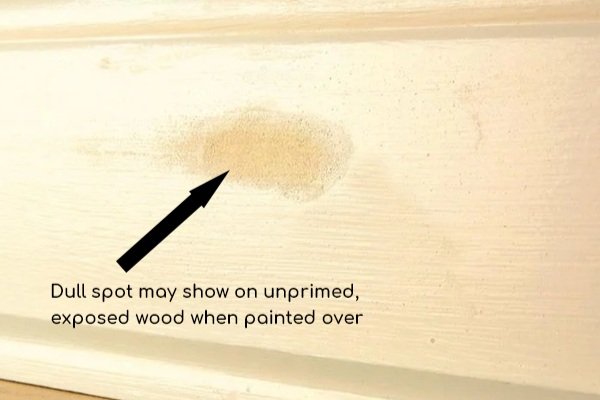
After scraping and sanding, use primer on exposed wood or other material that is not painted for better results when you do paint over the area. Ask your rep at the hardware store, Home Depot, or Lowels for suggestions on what to use!
Pro-Level Painting Preparation Tip:
One coat of paint sometimes does not hide the underlying color and sheen on trim. If you do not lightly sand the surface smooth between coats, the final finish may have a bumpy, irregular, or grainy texture.
For a smooth finish, sand the trim before applying each coat of paint if you do more than one (usually 2 coats is enough). Sand the trim with a fine-grit sanding sponge, dust and wipe the trim clean, make sure it’s dry, then apply the first coat of paint, let the paint dry at least 24 hours. Now, very lightly sand it a second time with a fine-grit sandpaper for a completely smooth surface, and apply the second coat. The results are often amazing! You’re already doing the project, so take the time for the 2nd sanding and 2nd coat of paint!
Bonus Tip: Caulk for a Seamless Look
Use latex caulk or a paintable latex/silicone blend to fill all the small cracks first, and use on any other crack or gap, no matter how small.
Keep a damp rag in your pocket to clean caulk from your finger and to keep the tip of the caulk tube clean.
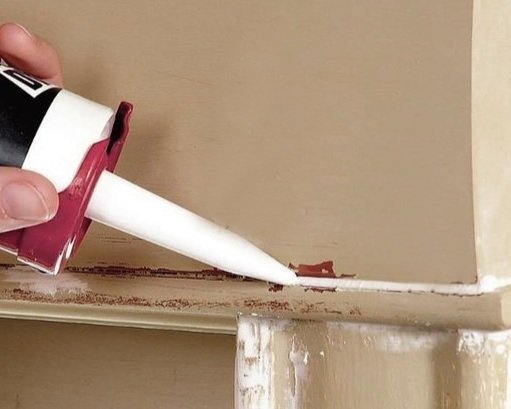
When cutting off the tip to pen the brand new tube of caulk, cut the caulk tube tip very carefully to create a tiny 1/16-in.-diameter hole to better insert caulk into small spaces. Then, if you have wider cracks to fill, simply cut caulk tube tip to make a larger hole. If necessary, smooth the caulk with your fingertip or use a soft, moist sponge before it tries for a good, smooth finish.
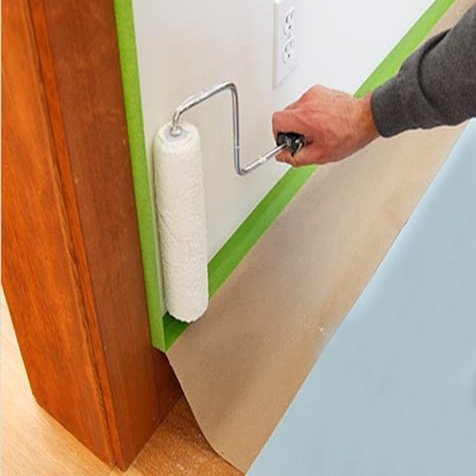
STEP 4: Protect other surfaces from unwanted paint.
It’s important to protect the floor and other areas from paint drips and stray brush marks by laying down a wide strip of painter’s tape.

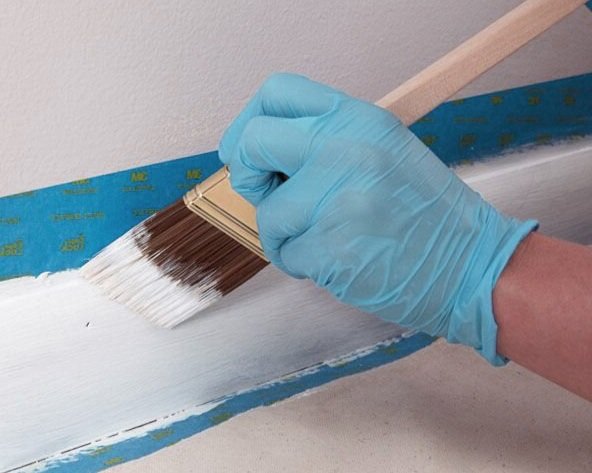
STEP 5: Start painting…and there’s a better way to apply it.
Load the brush with paint. Then quickly unload the paint from the brush onto the trim surface, in general, with a few back-and-forth brushstrokes “just” to get the paint on there. This is called “laying on” the paint. Repeat this until you’ve covered a 1 or 2 feet of trim with paint.
Now, without reloading the brush, drag the tip of the brush over the wet paint in one long stroke to “lay off” the paint, sweep the brush up up and off the surface at the end of each paint stroke.
Sections that are wider than your brush may require several parallel laying-off strokes to finish.
Complete a section. Let it try. Then if you want to add a 2nd coat, do so after the area dries.
When you’re done “laying off” a section with paint, move on and repeat the process, always working quickly to avoid brushing over partially dried paint.
Work in a single direction and keep a “wet edge.” This means try to NOT touch the previously dried, painted areas! Only paint on a wet edge (where you last finished a section) and continue painting the next section with new paint. This is to help avoid lap marks.
Why “lay on” and “lay off” the paint this way?
Paint starts to dry as soon as you put it on, and you have to smooth it out before this happens or you’ll end up with visible, dry brushstrokes or worse.
Think of “Laying On and Laying Off” painting technique as: when finished with a partial area, get more paint on the brush, and continue from the last, still wet edge of the paint, working toward and into the unpainted section. Repeat until the trim piece is completed painted. Continuing into a section by starting to paint from a dried edge is likely to result in less than desirable results.
Start at the top of the trim and work your way down, catching any drips along the way. It may be easier to work in one foot sections to have better control and focus.
BONUS TIP: Two ideas to help keep paint off of areas (especially the floor) while painting the trim:
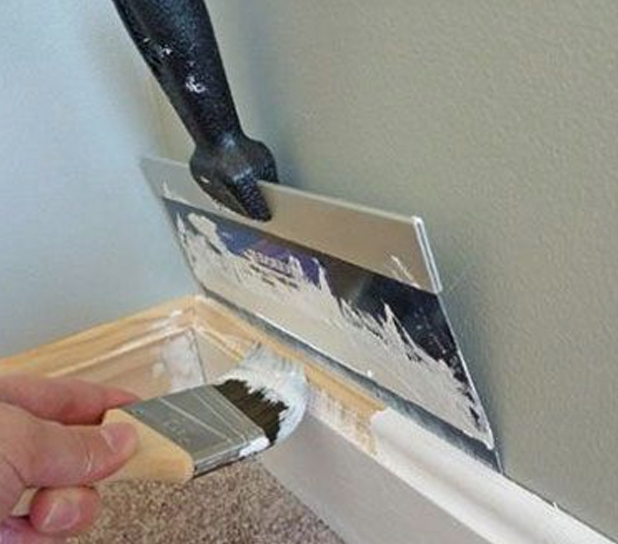
A) CARDBOARD or KRAFT PAPER and PAINTER’S TAPE:
- Use several flat and firm pieces of thin cardboard or cardboard “kraft paper” and line it up along the edge of the trim.
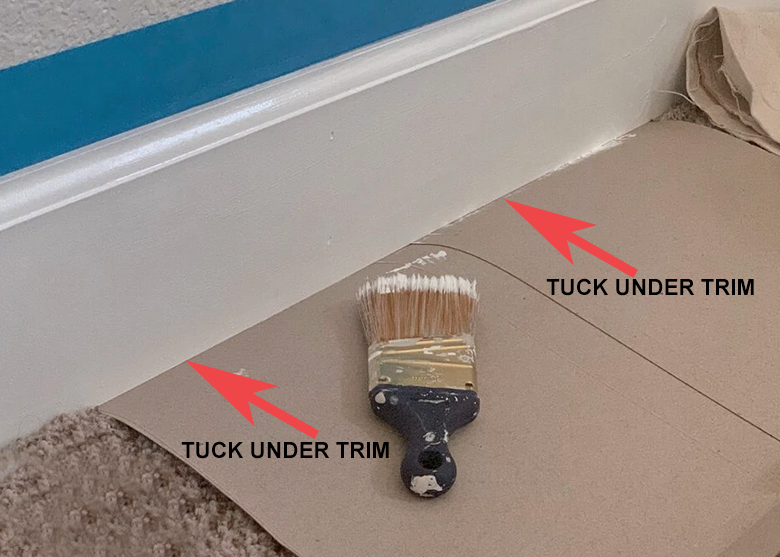
- Press the cardboard down into the carpet right along the trim edge and see if it’s possible to insert the edge of the cardboard under the trim.
- Use quality tape (don’t use the cheap stuff; for a few dollars more you’ll be better protection) on other areas where you do not want paint to touch.
- PLASTIC DROP CLOTH may work just as well! Try this if it’s too difficult to get the cardboard or kraft paper under the trim.
“Kraft Paper” and Painter’s Tape
An extremely useful combination to keep areas protected from paint. Preparation takes time, but the end results are better!
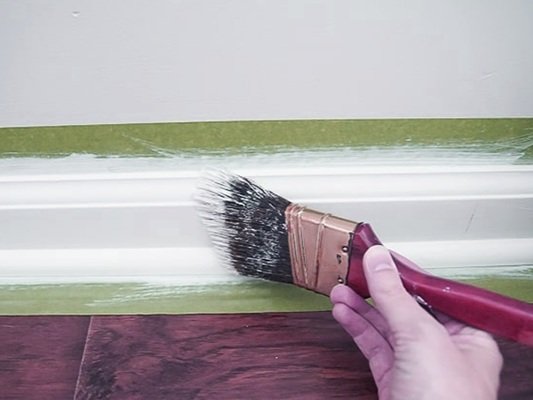
B) TAPE ABOVE AND BELOW TRIM:
1. While you can simply add painter’s tape on both sides of almost any trim, IF you’re prepping baseboard (on wall, near the floor), then place strips of 2-in. wide masking tape on the carpet along the baseboard, with one edge of the tape extended up about 1/2 inch onto the trim (covering the trim by about 1/2 an inch)
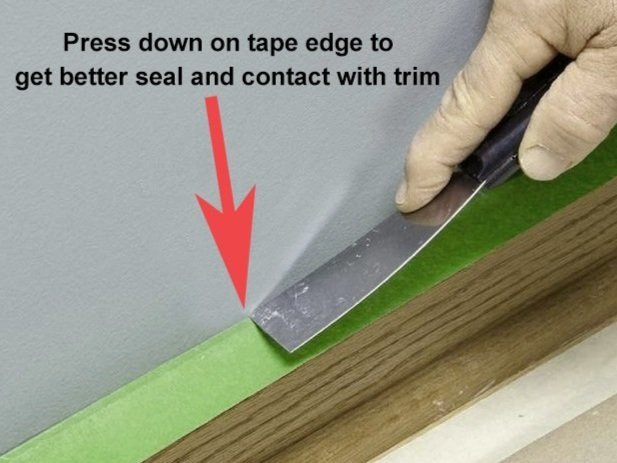
2. Then tuck this extra 1/2 inch of extended tape’s edge down between the baseboard (under it, if at all possible) and the carpeting with a putty knife.
STEP 6: Removing Tape- When paint is dry or wet?
There’s two choices on when to remove the painter’s tape.
A) Do it while the paint is still still a little wet (meaning, not fully dried).
Slowly pull tape away from surface at a 45 degree angle after you allow the pain to settle for approximately 5 minutes. It should NOT be dry and not running or “traveling” onto the tape. Wait for the paint to barely begin to dry then remove the tape. If you take of the tape right away, it is possible some paint may run or “travel” onto the trim.
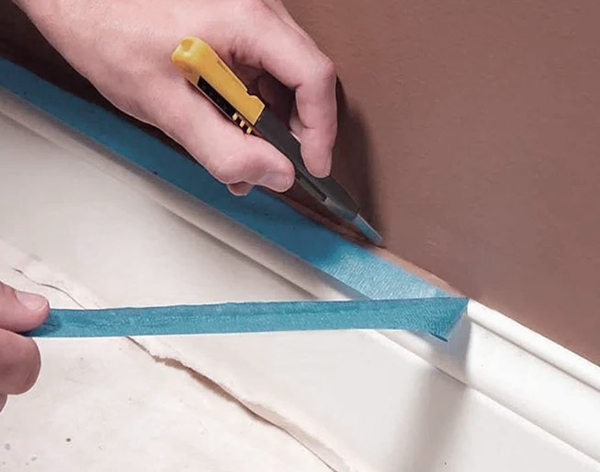
B) Do it when the paint is dry.
Wait for the paint to completely dry at least 24 hours, then use a sharp utility knife or box cutter knife to slice through the paint film that might be visible between the surface and the tape. Start in an inconspicuous area to make sure the paint is hard enough to slice cleanly. If you cut the paint while it’s still gummy, you’ll make a mess. As you cut the paint, pull up the tape at a 45-degree angle.
Do one or two rooms at a time, starting with whatever areas seems easier. Then, when you get to the bigger or more challenging areas, you’ll have a better idea what to do.
Enjoy your home’s new look for as long as you live there!
Reach out to me and let’s see what we can do to get you “top dollar”!